Skip to content
Join my newsletter list to be the first to hear our latest news!
Learn More
Home
About
All Recipes
Expand
Kid-Friendly Meals
Healthy Family Food
Desserts
Party Recipes
Lunchbox Ideas
Holiday Fun
Pinterest
Instagram
Facebook
Search
Toggle Menu
baking
Baking with Kids
|
Healthy Food
|
Recipes
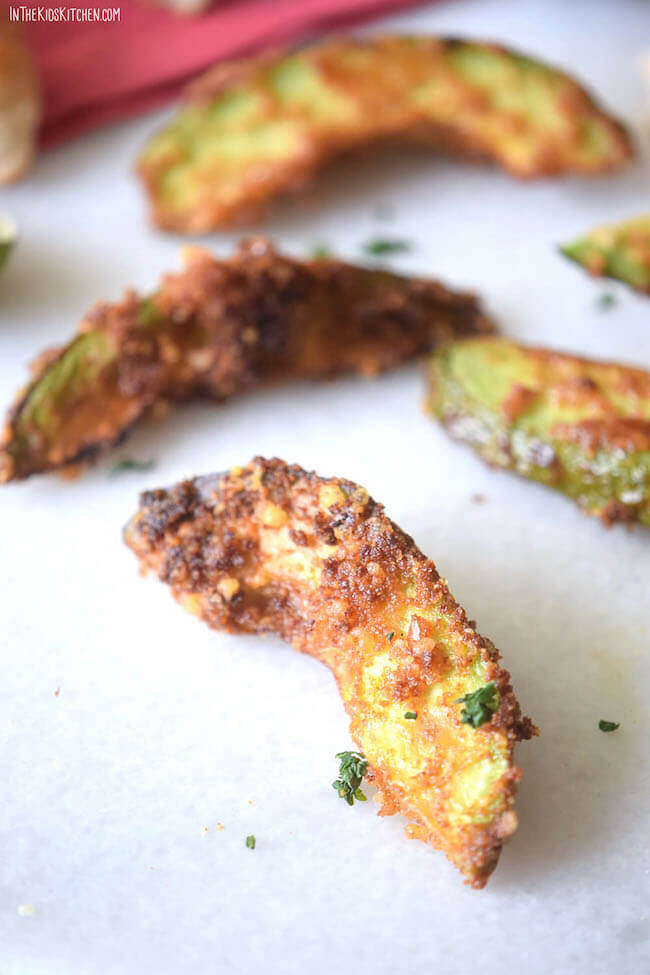
Healthy Baked Avocado Fries
Baking with Kids
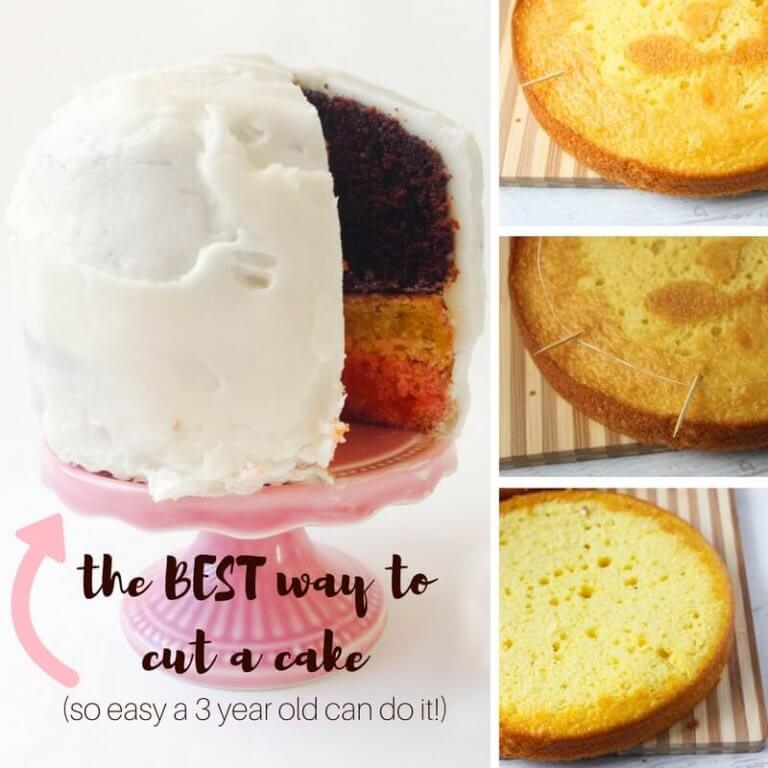
BEST EVER FOOLPROOF Cake Cutting Method
Home
About
All Recipes
Baking with Kids
Holiday Fun
Toggle Menu Close
Search for:
Search