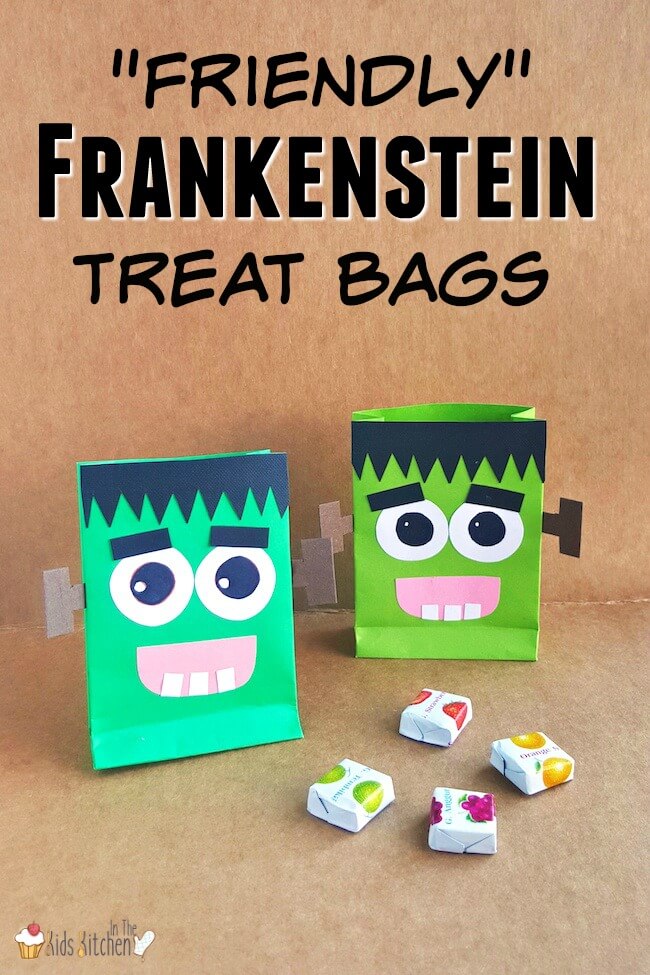
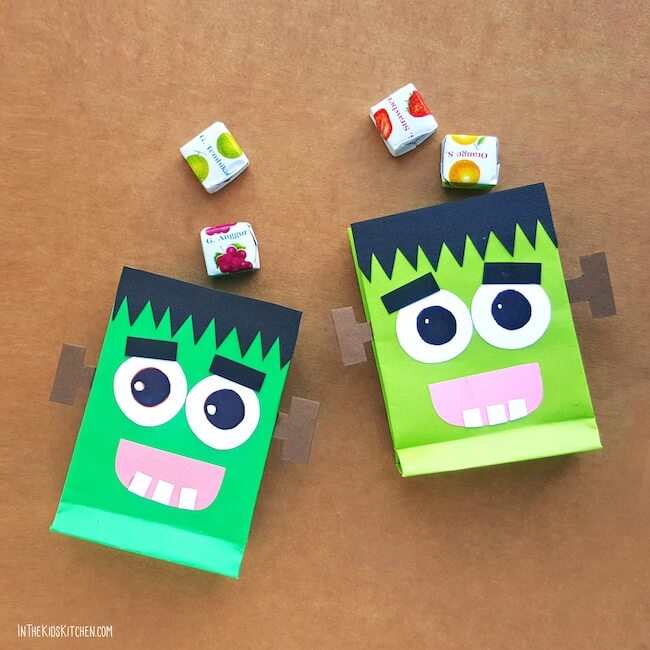
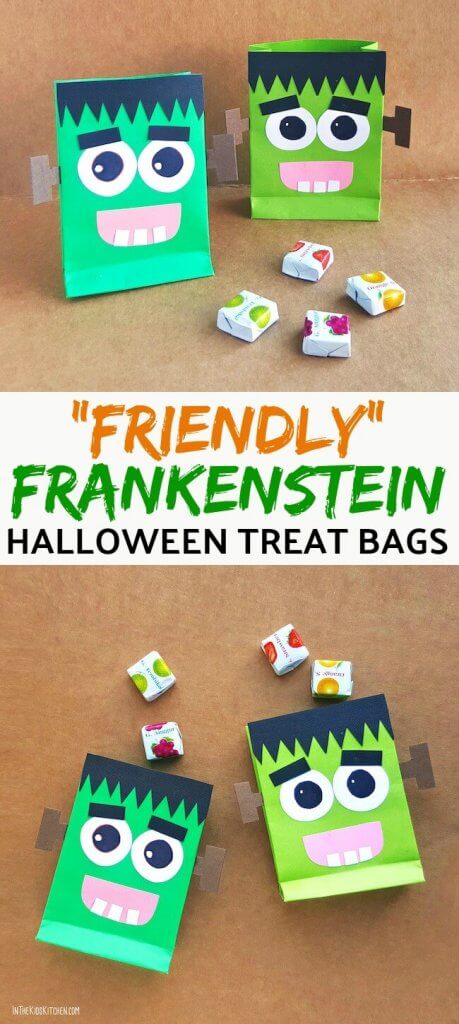
Friendly Frankenstein DIY Halloween Treat Bags
What’s Inside: A super cute (and easy) tutorial to make Friendly Frankenstein DIY Halloween Treat Bags! Free printable included.
Friendly Frankenstein Treat Bags
Halloween treat bags are perfect for packing party favors, passing out candy during Trick or Treat, or simply as a fun Halloween kids craft.
Instead of buying a bunch of cheapie plastic Halloween treat bags, why not make your own? Our Friendly Frankenstein DIY Halloween Treat Bags are paper based, so they biodegrade and are hopefully a bit better for the planet.
These homemade Halloween treat bags would also be a fun classroom craft that the kids can make themselves. Only simple supplies are needed, and with our free printable template, it’s an activity that can easily be done with a big group.
My girls don’t like gory or really scary stuff (nor do I), so we try to keep our Halloween activities “semi-spooky” and kid-friendly.
What I especially love about these Frankenstein Treat Bags is that the face isn’t scary at all, but rather a bit goofy. That’s why we nicknamed him “Friendly Frankenstein.”
Our Friendly Frankenstein DIY Halloween Treat Bags are a FUN (not scary) Halloween craft that kids will love, and is easy to set up with simple, inexpensive supplies.
–Stacey
Related: These creepy-cool Zombie Guts Cinnamon Rolls are a guaranteed Halloween party hit! Don’t worry, they’re not really scary and they taste absolutely delicious!
Supply List
- Free printable Frankenstein template
- Colored construction paper
- Craft glue or glue sticks
- Kids craft scissors
- Pencil
- Green paper bags
Frankenstein DIY Halloween Treat Bags Instructions
First, print our free Frankenstein template and cut out the pieces. There are two PDF patterns: one is blank so you can trace onto the colored construction paper of your choice. There is also a colored patten if you have a color printer. Those pieces can be glued directly onto your treat bags.
Once you have all your pieces cut, begin gluing them to your green bags.
TIP: If you don’t have green paper bags available, you could also use regular brown paper lunch bags and paint them green first.
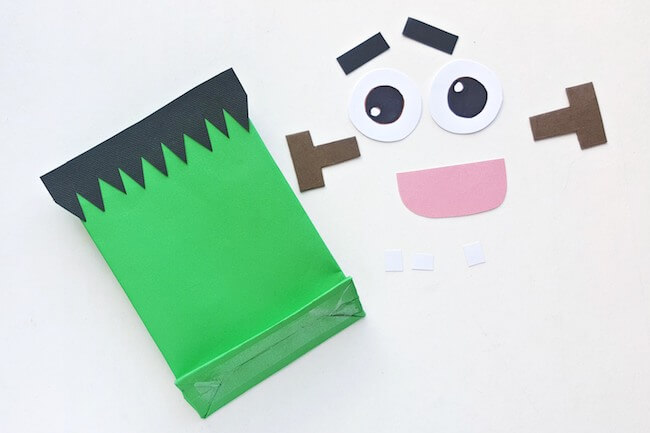
The strip with the zig-zag border should be glued along the open end of the bag. This is Frankenstein’s hair, and you want that to be at the top so his face is right-side-up when the bag is in use.
Glue the eyes and the eyebrows right below the hair; keep a gap between the hair and the eyes.

Glue the mouth and then glue the 3 square patterns (tooth) along the bottom side of the mouth’s inner part.
Glue the t-shape patterns (Nuts and bolts) on both sides of the paper bag.
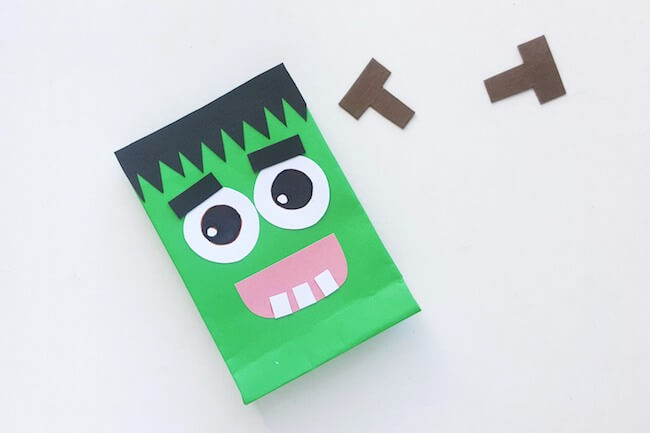
Feel free to add any other personalizations you like, such as a stitch mark on the face. Allow all glue and details to dry fully before using your Halloween treat bags.
Pin our Frankenstein Party Favor Bags on Pinterest:
You might also love:
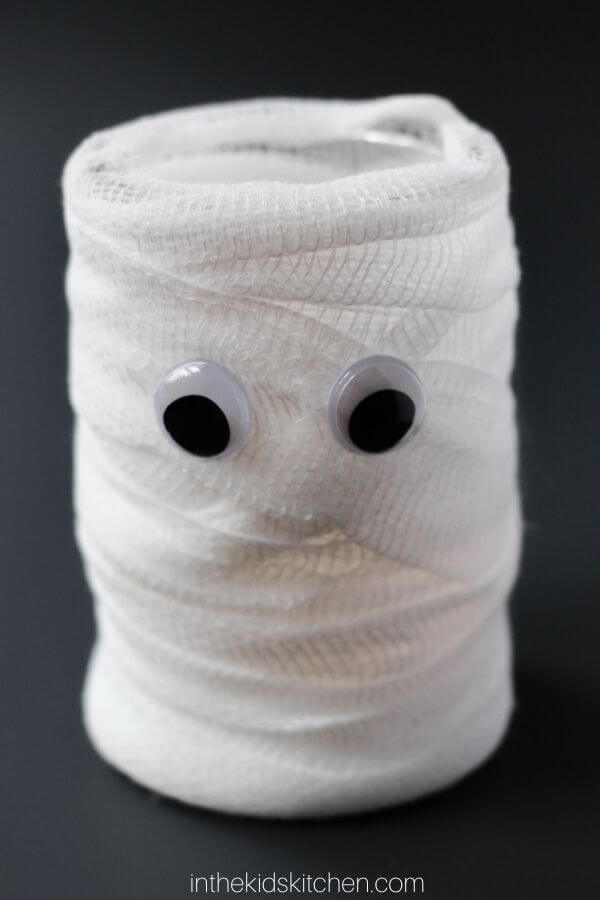
These mason jar mummies are another spooky Halloween craft for kids!
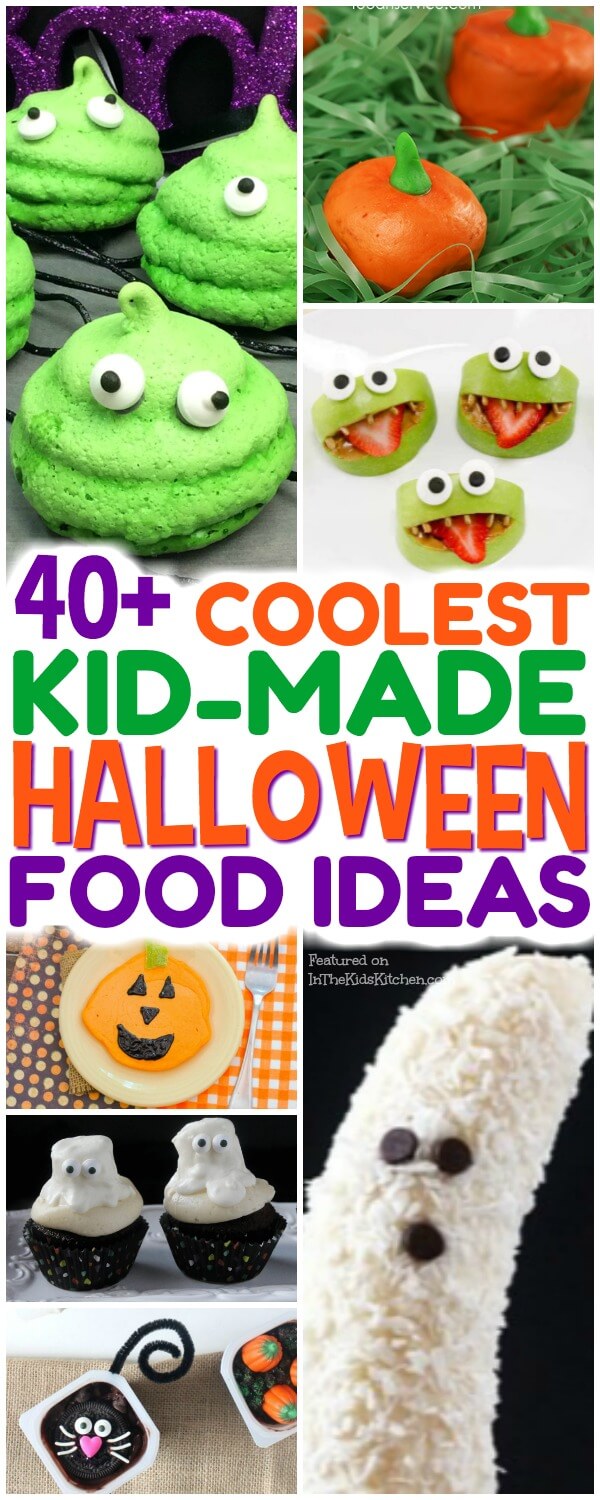
Be sure to check out this HUGE collection of kid-made Halloween snacks!