Skip to content
Join my newsletter list to be the first to hear our latest news!
Learn More
Home
About
All Recipes
Expand
Kid-Friendly Meals
Healthy Family Food
Desserts
Party Recipes
Lunchbox Ideas
Holiday Fun
Pinterest
Instagram
Facebook
Search
Toggle Menu
halloween
Baking with Kids
|
Desserts
|
Party Recipes
|
Recipes
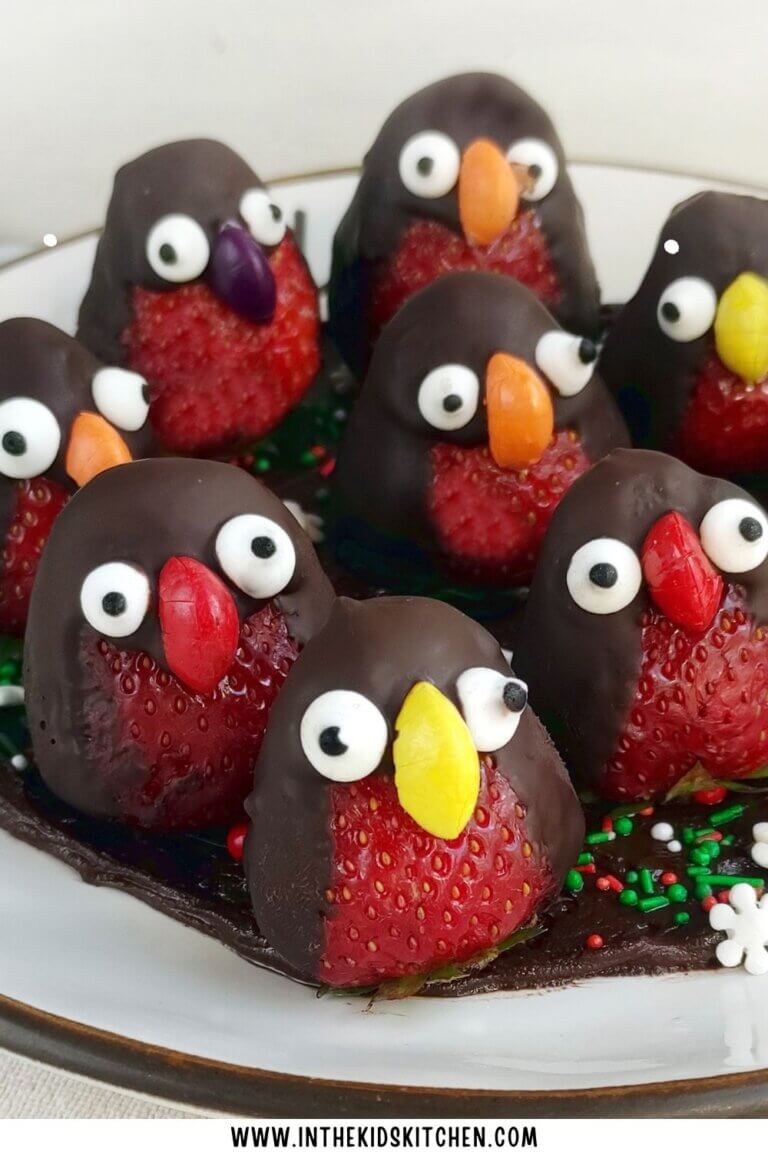
Chocolate-Covered Strawberry Owls
Baking with Kids
|
Desserts
|
Holiday Fun
Sheet Pan Halloween Pop Tart (with Video)
Desserts
|
Holiday Fun
|
Party Recipes
|
Recipes
Halloween Nutter Butters
Desserts
|
Holiday Fun
|
Party Recipes
|
Recipes
Jack Skellington OREOs
Holiday Fun
|
Kid-Friendly Meals
|
Lunchbox Ideas
|
Recipes
Halloween Mini Pizzas
Holiday Fun
|
Kitchen Activities
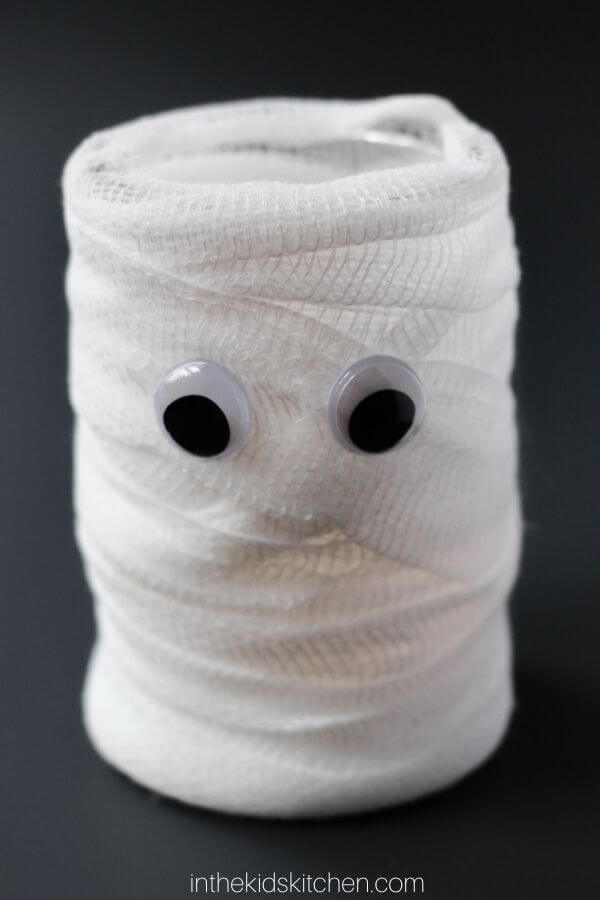
Mummy Mason Jar Craft
Holiday Fun
|
Kid-Friendly Meals
|
Recipes
Easy Mummy Hot Dogs
Holiday Fun
|
Recipes
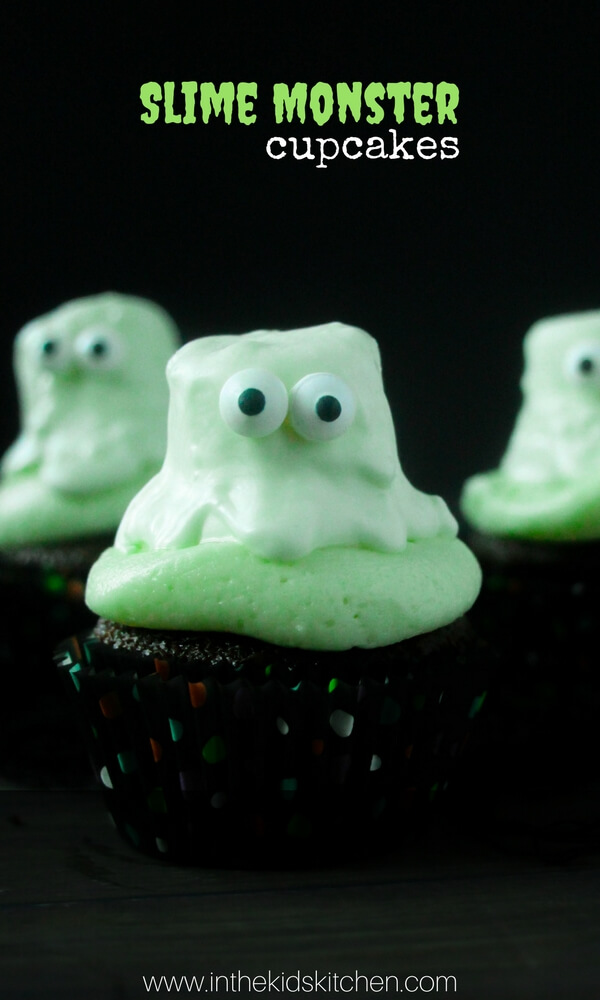
Slime Monster Cupcakes
Holiday Fun
|
Recipes
|
Sensory Play
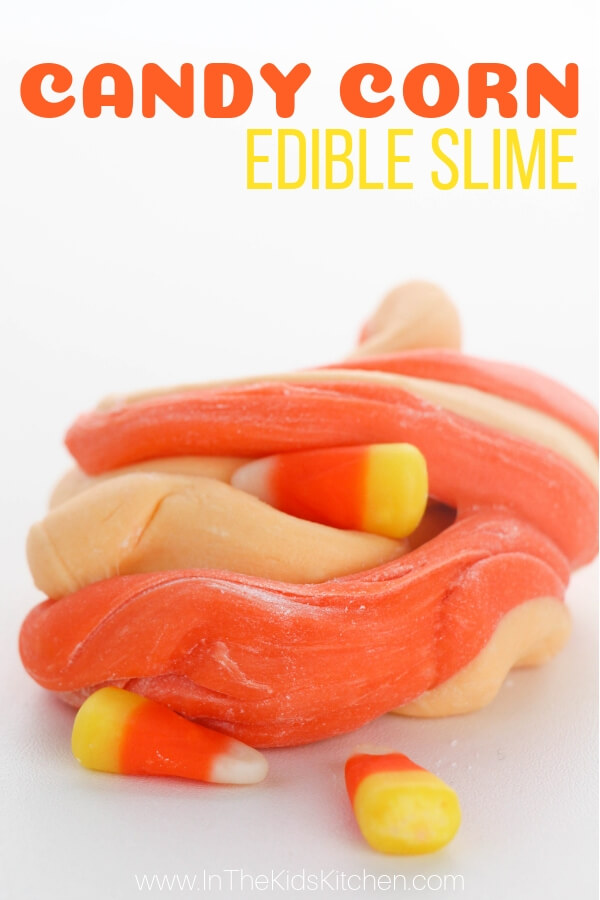
Edible Candy Corn Slime (with VIDEO)
Holiday Fun
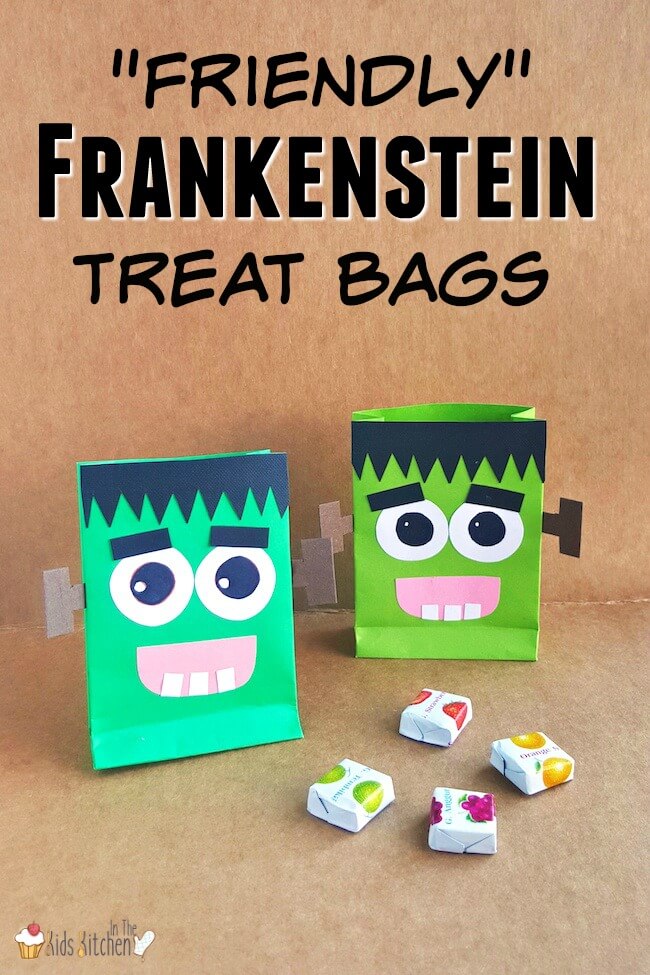
Friendly Frankenstein DIY Halloween Treat Bags
Holiday Fun
|
Recipes
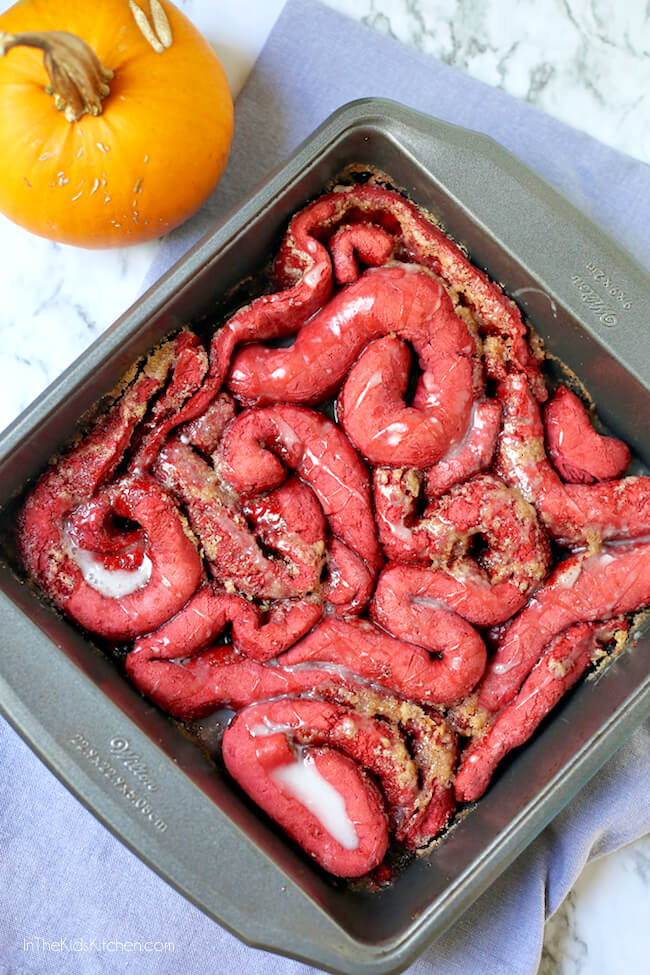
“Zombie Guts” Halloween Cinnamon Rolls (with Video)
Holiday Fun
|
Recipes
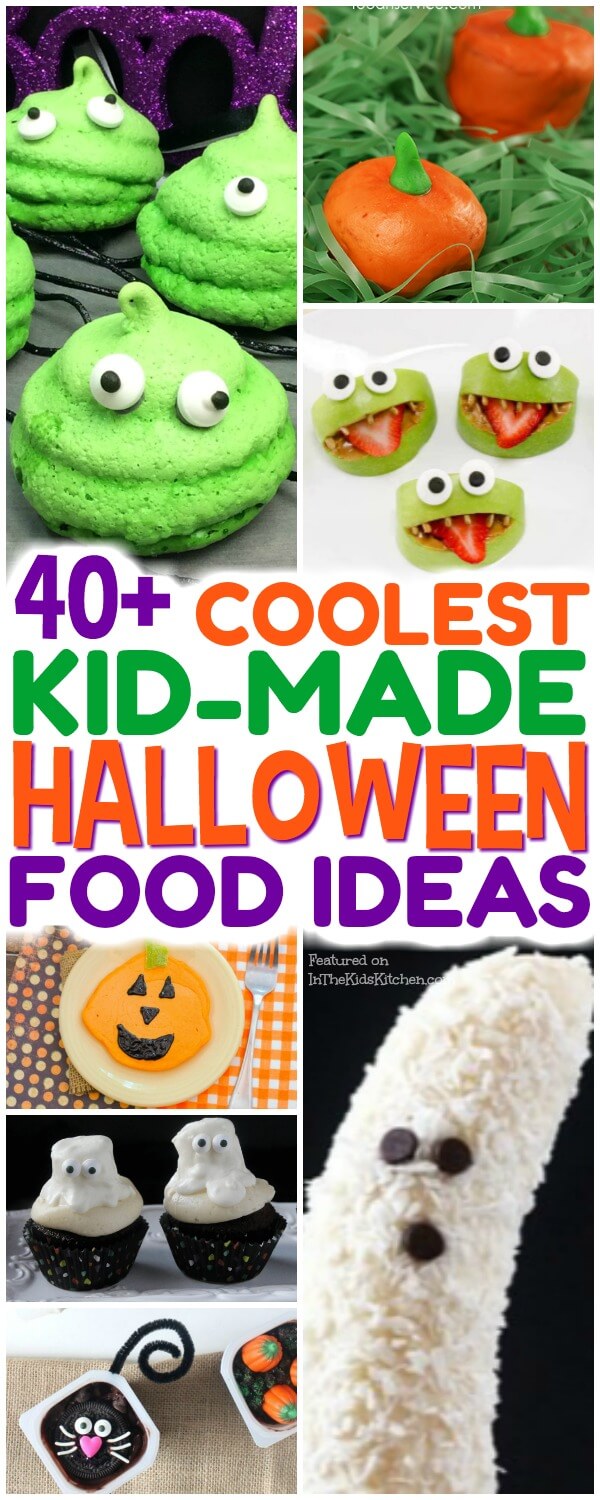
40+ Kid-Made Halloween Snacks
Page navigation
1
2
Next Page
Next
Home
About
All Recipes
Baking with Kids
Holiday Fun
Toggle Menu Close
Search for:
Search