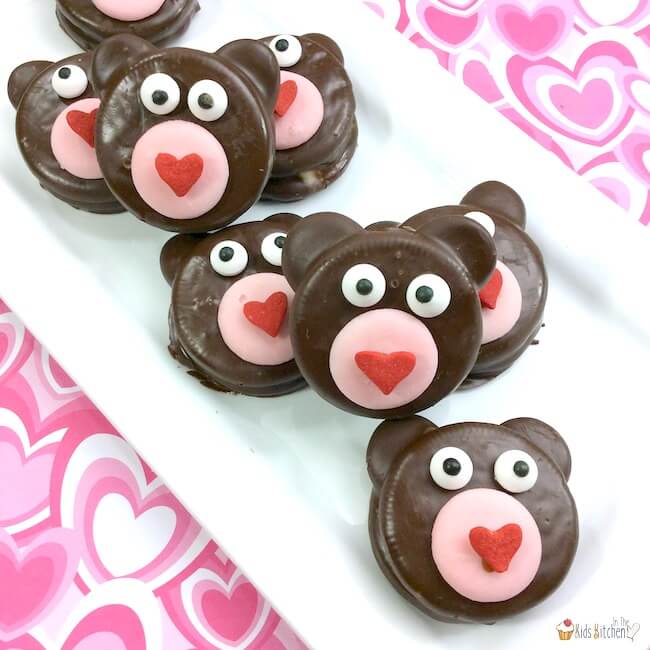
Valentine Teddy Bear Oreos

A super easy Valentine’s Day party treat, these Teddy Bear Oreos will steal your heart! Learn how to make chocolate covered Oreos decorated like teddy bears!

Teddy Bear Oreos for Valentine’s Day
If you loved our Oreo Polar Bear Cookies, then you’ll adore these sweet Teddy Bear Oreos we made for Valentine’s Day!
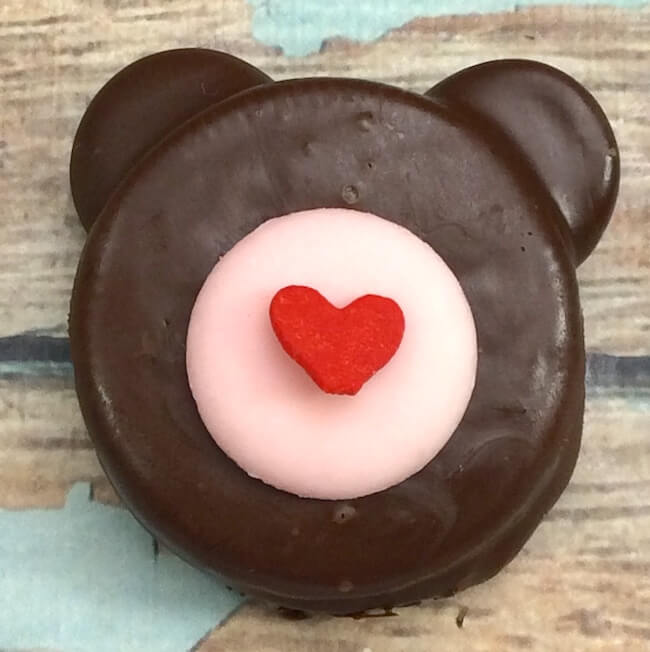
Aren’t the heart noses just the cutest??
Chocolate-dipped treats like these are perfect to make with kids because the cookies are already pre-made (no baking required!) and all you have to do is decorate (the fun part!!)
Valentine’s Day Teddy Bear Oreos Ingredients & Supplies
- “Double Stuf” Oreos
- Dark chocolate melting wafers
- Pink chocolate melting wafers
- Small edible eyes
- Wilton jumbo heart sprinkles
Scroll down to the printable recipe card for full measurements.
Kitchen Tools:
- 1 cookie sheet fitted with parchment paper or non-stick silicone baking mat
- toothpicks and/or chopsticks
How to Make Teddy Bear Oreos
Makes 18 cookies. Free printable copy of this recipe available at the bottom of the post.
Prepare the chocolate:
Melt 1 bag of dark chocolate melting wafers using a double boiler.
Note: You can also melt in the microwave – heat in 20 second intervals, stirring in between. Be sure to use a microwave-safe bowl and handle with care, as bowl and contents may become hot.
Assemble the bears:
Carefully separate the double stuffed Oreos.
Dip a toothpick into melted chocolate and add a dollop onto the creme part of the Oreo, where the ears will go.
Place a non-melted chocolate wafer onto the melted chocolate dollop and gently press down.
Add a larger dollop of melted chocolate into the center of the creme and place the top half of the Oreo cookie back in place.
Repeat steps with remaining Oreos and place into the fridge for about 10 minutes to set.
Decorate the bears:
Remove Oreos from fridges and dip each one into the melted chocolate. (Chopsticks work great for this step, or you can use a fork). Allow excess chocolate to drip back into the bowl before placing on a cookie sheet to dry. (Be sure the cookie sheet is lined with parchment paper or a non-stick silicone baking mat so you can peel the finished cookies off easily).
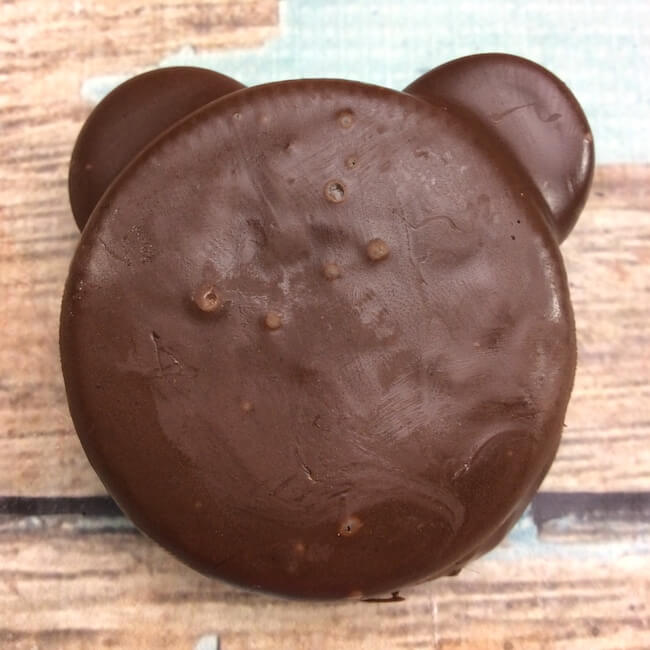
Repeat until all teddy bear Oreos are coated in chocolate.
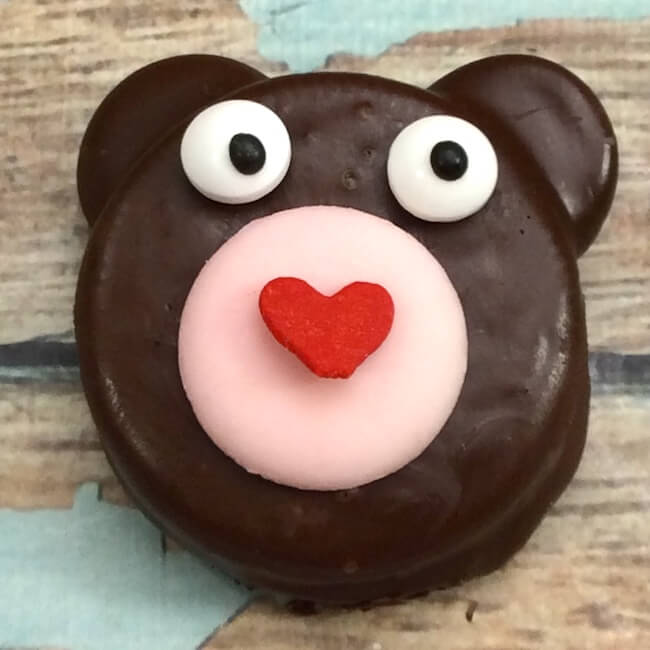
Use a drop of melted chocolate to attach a pink chocolate wafer to the middle of each Oreo.
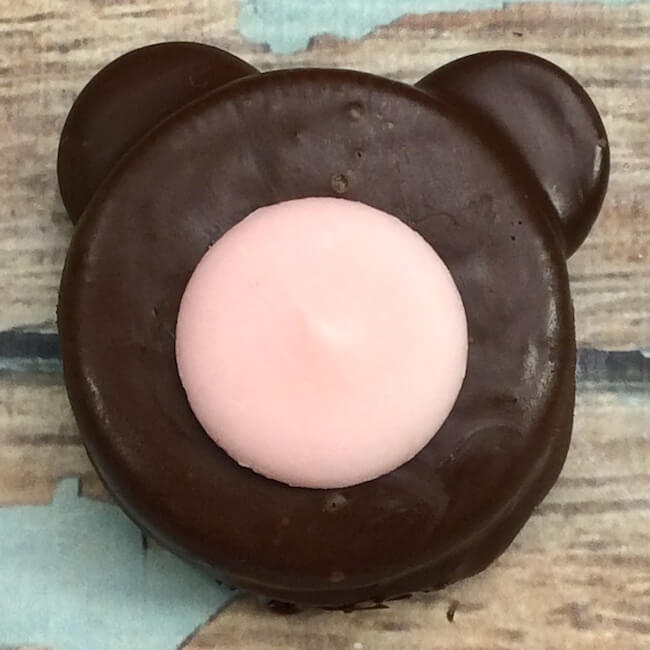
Then use another drop of melted chocolate to attached a red candy heart to the middle of each pink candy melt.
Use melted chocolate to attach edible candy eyes to the teddy bear Oreos. Repeat until all are decorated.
Allow chocolate to fully set (about 1 hour) before peeling off the cookie sheet. You can place in the fridge or freezer to speed up the process.
How to Store
Because they’re completely coated in chocolate, these cookies can stay fresh for quite some time — up to a month! They do not need to be refrigerated. Simply keep in an airtight container at room temperature.
MORE OF OUR FAVORITE VALENTINE’S DAY TREATS FOR KIDS:
- Strawberry Cake Mix Cookies
- Cupid’s Arrow Pretzels
- Chocolate Chip Cookie Dough Hearts
- Valentine’s Day Wafer Cookies
- Teddy Bear Cupcakes
- XOXO Valentine Cupcakes
- Chocolate Covered Strawberries
- Valentine’s Day Pretzel Bark
Be sure to pin this adorable Valentine’s Day Oreo Cookies recipe on Pinterest:

Grab a free printable copy of our Oreo Teddy Bear Cookies recipe:
If you like this recipe, rate it! We’d also love to hear what you think in the comments below.
Valentine Teddy Bear Oreos
Cute chocolate covered Teddy Bear Oreos for Valentine's Day
Ingredients
- 1 package of "Double Stuf" Oreos
- 2 bags of dark chocolate melting wafers
- 1 bag of pink chocolate melting wafers
- 1 package of small edible eyes
- 1 container of Wilton jumbo heart sprinkles
Instructions
!Prepare the chocolate:
Melt 1 bag of dark chocolate melting wafers using a double boiler or microwave. (If using microwave, heat in 20 second intervals, stirring in between. Be sure to use a microwave-safe bowl and handle with care, as bowl and contents may become hot.)
!Assemble the bears:
- Carefully separate the double stuffed Oreos.
- Dip a toothpick into melted chocolate and add a dollop onto the creme part of the Oreo, where the ears will go.
- Place a non-melted chocolate wafer onto the melted chocolate dollop and gently press down.
- Add a larger dollop of melted chocolate into the center of the creme and place the top half of the Oreo cookie back in place.
- Repeat steps with remaining Oreos and place into the fridge for about 10 minutes to set.
!Decorate the bears:
- Remove Oreos from fridges and dip each one into the melted chocolate. (Chopsticks work great for this step, or you can use a fork). Allow excess chocolate to drip back into the bowl before placing on a cookie sheet to dry. (Be sure the cookie sheet is lined with parchment paper or a non-stick silicone baking mat so you can peel the finished cookies off easily).
- Repeat until all teddy bear Oreos are coated in chocolate.
- Use a drop of melted chocolate to attach a pink chocolate wafer to the middle of each Oreo.
- Then use another drop of melted chocolate to attached a red candy heart to the middle of each pink candy melt.
- Use melted chocolate to attach edible candy eyes to the teddy bear Oreos. Repeat until all are decorated.
- Allow chocolate to fully set (about 1 hour) before peeling off the cookie sheet. You can place in the fridge or freezer to speed up the process.
Nutrition Information:
Yield:
18Serving Size:
1Amount Per Serving: Calories: 29Total Fat: 2gSaturated Fat: 1gUnsaturated Fat: 1gCholesterol: 0mgSodium: 9mgCarbohydrates: 4gFiber: 0gSugar: 3gProtein: 0g
You might also like:
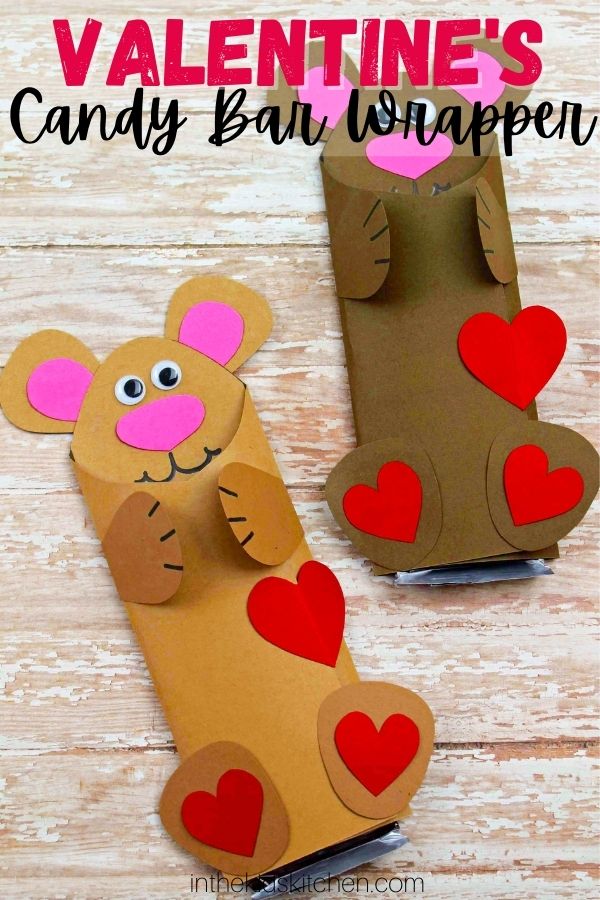
Valentine Teddy Bear Candy Bar Wrappers


I love how this is NO-Bake! Perfect for moms on the go. They turned out super cute too!
Could you put on a stick to make a lollipop? Thank you
I don’t see why not! I bet that would be super cute! 🙂